Showing posts with label intex. Show all posts

Tuesday, 28 July 2015

Resurrection Remix ROM for lava iris x8


About Resurrection Remix ROM
Installation
Downloads 
About Resurrection Remix ROM 


Resurrection Remix the ROM has been based on CM,slim.omni and original Remix ROM builds, this creates an awesome combination of performance, customization, power and the most new features, brought directly to your Device
Many things that in previous versions were tweaked with mods, are now included by default in the ROM so, please enjoy!
Special thanks to, the CM team,OMNI team ,SLIMROMS and of course to all the supporters
Included Main Features


-Navigation Bar
-Enable/Disable Navbar
-Navbar Ring Switch
-Navbar Ring Targets
-Navbar Button Customization
-Navbar Dimensions(Potrait & Landscape)

-Statusbar
-Brightness Slider
-Enable/Disable Show Notification Count
-SuperUser Indicator Switch
-Carrier Label
-Carrier Label Switch
-Carrier label Colour
-Quick PullDown Switch
-Smart Pulldown Switch
-Clock Customizations
-Time & date
-Clock Colour
-Day & date Toogle
-Center Clock/Right Clock Choice
-Battery
-Battery Bar customization
-Battery Icon Customization(circle/landscape/Potrait and more)
-Battery % Text
-Network Traffic Indicator

-Theme Chooser
-RR exclusive PITCH BLACK THEME
-Animations
-Toast Animations
-ListView Animations
-System Animations

-Gestures
-Gestures Anywhere Feature

-App Circle Bar
-Choose apps in App circle
-Trigger Width
-Trigger Hieght
-Trigger Position

-Recents Panel
-Clear All button Switch
-Clear All Tasks Switch
-Clear All Button Location(Top right,Top Left,Top Center,Bottom Left,Bottom Right,Bottom Center)

-Cclock Widget
-CLock And Alarm Customizations
-Weather Panel Customizations
-Calender Events

-LockScreen
-Lockscreen Shortcuts
-Choose upto 5 Shortcuts
-100+ Icons for Shortcuts

-Quick Slider Shortcuts

-Notification Drawer
-Weather Display Switch
-Quick Settings
-Choice to Add 20+ Tiles
-Enable 2/3/4 Tiles per Row
-Enable Disable Birghtness Slider in Notification Panel
-Advanced Location Settings Switch(Choose Battery saving/Device Only/High Accuracy Directly in Notification Panel)
-LongPress Toogles to Enter Settings

-Buttons
-Backlight Timer
-Backlight Strength
-Navigation Bar left/Right handed mode Switch
-Power Menu
-Power Menu End Calls Switch

-Home Button(For devices with HW keys Only)
-Home Button Wake Up
-Home Button answer call
-Long Press Actions
-Double Tap Actions

-Back Button(For devices with HW keys Only)
-Wake Up device Switch

-Menu Button(For devices with HW keys Only)
-Wake Up Device Switch
-Short Press Actions
-Long Press Actions

-Search Button(For devices with HW keys Only)
-Wake Up Device
-Short Press Action
-Long Press Action

-Volume Buttons
-Wake Up Device
-Playback Control
-Keyboard Cursor Control
-Swap Buttons on Landscape mode

-Perfomance Profiles
-LCD Density
-Expanded Desktop Mode
-All New CM Audio FX App
-Heads Up Customizations
-OverAll Smoothness Improvements
-Quick Unlock
-Optimizations to Improve Battery
-ALL cm12 Features
-AND MUCH MUCH MORE
NO ONE READ THE THINGS ABOVE ?
I KNOW BUT IF U DONT READ THIS U LL NOT ABLE TO ENJOY THE ROM!!!!!!!!
TESTED BY ME WORKING CLEAN AND BUGFREE USING  philz RECOVERY I M UPLOADING THE RECOVERY TOO IF NO 1 WANTS TO TAKE ANY RISKS
READ THIS CAREFULLY!!!!!!!!!!!!!!!!!!!!!!


[b][i] Installation Insturaction [indent]
- (Remenber only philz and twrp 2.8.6 can flash this rom )
I recommend to flash it over a freshly install pac or cm11 without wiping data ( not necessary u may proceed without pac or cm11)
1) put d rom in external sd card
2) rboot to recovery > wipe cache davilk cache and data(not recommended for cm11 or pac user)
install zip > navigate to sd card > select zip
3) flash d rom
now the real part begins
after booting d rom u will get blutooth fc ignore this
4) now open app drawer (launcher) > open the app named "selinuxchanger"
5) allow root permission
6) then select "permissive"
without wasting time navigate to setting > developer setting > turn on advanded reboot
7) hold power button
8) click on reboot
9) select soft reboot
voila camera and sensor starts working

Cam not there in launcher
dont worry install any third party app or use camera from lock screen

wifi not turning off
go to setting > wifi > press action key > select advanced > disable scanning always availale

sound very low?
just enable all 3 buttons down in Dolby atom and use any 3rd party music app


Screenshots


PATCHES :-
1st : link
2nd :   link

SUPER SU FLASHABLE LINK (USE THIS IF U LOVE SUPERSU OR USE INBUILT ROOT LIKE IN CM 12.1) : LINK


philz RECOVERY : LINK


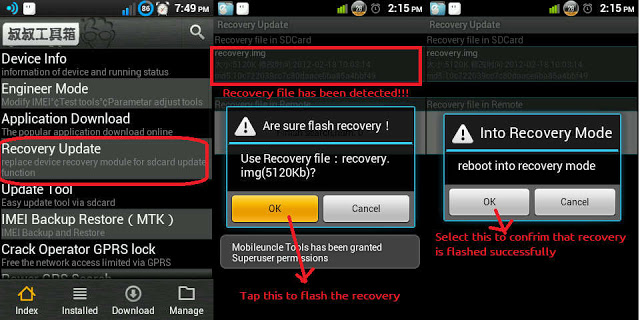
HOW TO FLASH A RECOVERY ?
READ THE XDA THREAD CAREFULLY OR JUST LEAVE IT BUT DONT ASK THESE THINGS AGAIN!!!!!!!


FAQ...
Q:Camera and Sensors are not working.
A:Just soft reboot

Q:I can't see installed Apps In My app drawer.
A:Just FC the launcher..
or try using Other Launchers.. 

Q:Sound is low..
A:Just flash Dolby Atmos from here.And enable all three buttons.
If still facing Low sound...go to audio fx and turn it off

Q.Can't Connect to Computer
A. Just go to storage/USB connection/and tick on mtp...
That's it


JUST READ EVERY THING CAREFULLY!!!!!!!! 
HIT LIKE ON XDA TOO IF U LOVED MY WORK OR WANT MORE ROMS :)

Thursday, 16 July 2015

making any rom lag free

How to make your low end devices lag free and lightning fast.

HERE IS A SIMPLE BUT THE MOST EFFECTIVE WAY TO DO SO:

INSTRUCTIONS

Download this simple app from the link here (xda version) or here
if u liked the app plz buy it from here

(thanks t its developer)
and modify as shown below 

  Seeder Kills Lag in Android, Seriously Boosts Your Phone's Performance

Thursday, 9 July 2015

CyanogenMod 12.1 for lava iris x8


CyanogenMod 12.1 Status:

Working:
- RIL: Telephony (Calls / etc) (2G and 3G) (In Both SIMs)
- ART
- Sensors
- LED's
- Rear Camera ( pictures )
- Front Camera ( pictures )
- FlashLight
- Sound
- Bluetooth
- Wifi
- Microphone (For Calls and in some apps)
- Data connection
- CyanogenMod related features (Theme Manager, etc ... )

Not Working / Needs Improvements :
- GPS
- Camcorder ( You can use 3rd party video recording apps from Play Store)
- USSD codes. only works in some Providers
-wifi looses password sometimes
-no fb calling and google voice search
other bugs tell me


Single / Dual SIM Behavior :

On Dual-SIM (when using both SIM slots) :
3G Will be forced to Slot 2 (Depending on your SIM Provider)
Data connection will only properly work on Slot 2 (Depending on your SIM Provider)

On Single-SIM (when using only one SIM slot) :
You can toggle between 2G / 3G just fine
Data connection will work just fine

Also when in Single-SIM and to avoid bugs with Data connection
Change this line in build.prop (/system):
Code:
persist.radio.multisim.config=dsds
to
Code:
#persist.radio.multisim.config=dsds


Flash Instructions:
Backup, Backup, Backup ...
You need to be on the Unofficial KitKat Base (due to the new KK partitions)
Put the zip file on external SDCard
Flash with ctr recovery for iris x8
Full Wipes
Flash Rom
Flash minimal GAPPS 5.1
Enjoy
 ** note : install xinternalsd and xposed after flashing cm12.1 rom to avoid bugs 
xinternalsd:- https://drive.google.com/open?id=0B5...DBRcjFGc09mNU0
xposed :-http://mylavax8.blogspot.in/2015/07/xposed-for-lollipop-cm-12.html

Friday, 19 June 2015

Making Our device a bit better

*Thanks to slad480

Features 

- Full memory management.
-Linux kernel tweaks and improvements for better performance and battery life.
- Entropy generator engine used to reduce lags.
- Zipalign apps in "/system" and apps in "/data" every 48 hours which result in less RAM usage.
- Sqlite optimizations and faster database access.
- CPU governors tweaks and improvements for better performance and battery life.
- Increased SD Card read-ahead cache to 2048 KB .
- Ad blocking.
- Build.prop tweaks and improvements.
- Cleans log files and tombstones at every boot.
- Many other tweaks for better performance and battery life!


How to install :

Before Flashing please do a nandroid backup to avoid any incompatibility issues.
1. Download the Fly-On Mod main pack and sqlite pack according to your phone's Android version.
2. Rebooting into recovery mod.
3. Install Signed_Fly-On_Mod_V4.0-Alphax.zip and sqlite_xversion.
4. Reboot and feel the smoothness!


link to flashable zip
orignal xda thread http://forum.xda-developers.com/showthread.php?t=2226373
* I M NOT RESPONSIBLE FOR BRICKED DEVICES

Wednesday, 3 June 2015

CUSTOM RECOVERY FOR MTK DEVICES

Custom CWM Recovery For MTK


CWM RECOVERY For Micromax, Karbonn, ZTE, Huawei, Dogee, All Samsung Clones, All iPhone Clones and all MTK Devices

THINGS YOU NEED :  
  • A MediaTek android device (MT65XX) 
  • Your phone must be rooted already: HOW TO ROOT
  • USB Chord.
  • Windows PC/Laptop.
  • For ADB Drivers : Download pdanet+

TOUGH WAY (if u don't trust me)

MTK DROID TOOLS DOWNLOAD : MTK DROID TOOLS
How To Flash ClockworkMod (CWM) Recovery on Any MediaTek (MT65xx) Android Device :


1. Download necessary files above.

2. Install the downloaded PDANet to your computer. It contains ADB Drivers.

3. Turn on your android device and connect it to your computer using USB Chord. (Make sure to Enable USB Debugging, go to phone Settings -- Developer Options -- Enable USB Debugging.)

4. From your computer, open MTK Droid Tools that you have downloaded above and extract it to your desired location.

5. Open MTK Droid Tools.exe from the extracted folder (Run as administrator). Wait for the tool to detect your device. (If UBIFS warning appeared in the status message, this process will not work for you. Only ext4 supported.). Notice on the bottom-left part of the tool, a YELLOW color indicator means that your android device is does not have root shell yet. If it is GREEN already, proceed to step 7.

6.  Click ROOT button to enable root shell your device. Wait for the progress bar on the Status, see your phone to Grant Superuser access. If the color indicator turns GREEN, then you have successfully enabled root shell for your device.

7.  Now, select the Root, Backup, Recovery tab and and further choose To Use Boot From Phone from the selections. Click Recovery and Boot, a message prompt will appear "To make CWM recovery automatically", click YES.

8. Wait for the tool to build the CWM recovery and another prompt will appear "install patched boot to phone?" select NO, wait a little bit more and another prompt will appear again "install created recovery to phone", now select YES.Auto Insurance

9. When the tool ask you to reboot your phone to recovery, click Yes and it will reboot to CWM recovery shortly. Check out your new custom recovery.Auto Insurance

Congratulations! You now have ClockworkMod custom recovery on your MediaTek android device.

EASY WAY (DONE BY ME)


THINGS YOU NEED :  
  • A MediaTek android device (MT65XX) 
  • Your phone must be rooted already: HOW TO ROOT
  • Mobile uncle tools

How To Install CWM Recovery on Lava Iris x8 and other Mtk devices

  • Download the file named recovery.img
  • Transfer the recovery.img file to the root of your phone memory via USB data cable
  • On your phone, download and install Mobileuncle Tools from the Play Store
  • Launch Mobile Uncle Tools. When it requests for Root Permissions, tap Grant
  • You should now see the Main Menu in Mobileuncle Tools
  • Tap Recovery Update
  • The app will scan your phone and list the recovery.img file you transferred to your phone earlier
  • Tap the recovery.img option. You should now see a dialog box asking you if you’re sure you want to flash the recovery. Tap OK
  • At this point, your phone may seem unresponsive. Just be patient and let the tool flash the recovery image. Once the flashing is complete, you should see another dialog box asking you to reboot to recovery, Tap OK
    image: http://cdn6.dottech.org/wp-content/uploads/2014/03/Flash-recovery-via-Mobileuncle-Tools-620x310.jpg?e55e40
    Flash recovery via Mobileuncle Tools
  • Your phone should now reboot into CWM Recovery
That’s it!! You have successfully installed CWM Recovery on your rooted Micromax Canvas 4 A210, and are all set to check out custom ROMs on your rooted device. Enjoy!!


Sunday, 24 May 2015

HEATING PROBLEMS IN ANDROID

How To Solve Heat Problem In Your Smartphone

Mostly Android Users Face The Heating Problem With Their Android Smartphone , Some Users Face Heating Problem While Playing Game Some Face Heating Problem Just By A little Bit Use , Heating Of Android Phones occur Mostly Due To Some Apps Running in Back Ground . Those Apps are use less and May push Your android Phone To Heating problem .

And Some Times Heating Of Android Phone Occurs Due To Hardware Failure issues , If There is a Hardware Issue With Your Android Smartphone And it is Giving excessive heat , Then You have to seek Help From Your Nearest android Service centres , Because Android Phone Heating issues  Due To Hardware Malfunction / Failure aren't Possible to Be solved By Software Tweaking . 
The heating in your droid maybe because of RAM and CPU usage so controlling this might be helpful ie by closing apps and not allowing them to work in background

HOW TO SOLVE THIS ?

FOR NON ROOTED USERS
Try this app
This can boost your nonrooted phone everytime u ask for a boast

Another best app to boast your device and to make it cool is this
*for its material ui and easy interface


FOR ROOTED USERS

BASIC REQUIREMENTS

  • ROOTED ANDROID (ICS+)
  • XPOSED INSTALLED
  • PATIENCE


* DO AT YOUR OWN RISK I WOULD NOT BE RESPONSIBLE FOR A BRICKED PHONE

*for instructions to install xposed check my previous posts

Download this app here

best app for rooted users and does its work itself no need to boast the device again and again

Another good app is this

a app if set properly can change your android smartphones battery life 

App list is too long and many on beta version so be connected for updates i m testing them 

Saturday, 23 May 2015

IOS STATUS BAR FOR KITKAT (4.4)


BASIC REQUIREMENTS

  • ROOTED ANDROID (ICS+)
  • XPOSED INSTALLED
  • PATIENCE
  • A WORKING BRAIN :P


* do at your own risk i would not be responsible for a bricked phone

*for instructions to install xposed check my previous posts

FEATURES
  • STATUSBAR
    • Signal position LEFT | RIGHT
    • Signal icons style SYSTEM | SOME STYLE
    • Carrier label with custom text
    • Notification icons SHOW ICONS | SHOW ICONS COUNT
    • Clock position LEFT | CENTER | RIGHT
    • Clock size
    • Battery style SYSTEM | SOME 5 OTHER STYLES
    • Battery percentage SHOW | HIDE
    • Battery percentage size
    • Tinting
  • NOTIFICATION PANEL
    • Blurred background
    • Background dim color #00000000 ... #FFFFFFFF
  • RECENT PANEL
    • Blurred background
  • WHITE KEYBOARD
  • WHITE SETTINGS APP

    DOWNLOAD

Friday, 22 May 2015

LOLLIPOP RECENT PANEL FOR ANDROID


BASIC REQUIREMENTS

  • ROOTED ANDROID (ICS+)
  • XPOSED INSTALLED
  • PATIENCE

* DO AT YOUR OWN RISK I WOULD NOT BE RESPONSIBLE FOR A BRICKED PHONE

  • *for instructions to install xposed check my previous posts

DOWNLOAD THE MODULES YOU WANT:

– Firstly, note that some modules work on all devices and some work for specific mobile brands.
Download this xposed module form this link.
Install the module and reboot your device.
open the app any personalize the way you want it to be.
What will you personalise
  • you get a lollipop status + notification bar
  • a recent panel like lollipop
  • dailer ui from lollipop (few devices)
  • animations from lollipop
  • for recent panel follow these screenshots

 select the experimental notification settings from the system ui and reboot is must.

Thursday, 21 May 2015

LOLLIPOP UI (ALMOST PURE) FOR ROOTED USERS

BASIC REQUIREMENTS

  • ROOTED ANDROID (ICS+)
  • XPOSED INSTALLED
  • PATIENCE
  • A WORKING BRAIN :P

* do at your own risk i would not be responsible for a bricked phone

A FEW POINTS TO BE NOTED BEFORE STARTING:

  1. Rooting your phone is mandatory if you want to use Xposed Installer. For rooting, you can get a guide anywhere over the internet or you can comment below so that I can help you out.
  2. If you are an android gingerbread user, you will have to use another version of the app. More info is provided in this thread.

PART 1: INSTALLING THE XPOSED FRAMEWORK:

1. Download app – Xposed Installer Apk
2. Install and launch the app, go to the section named ‘Framework’ and click on ‘Install/Update”
3. It will ask you to reboot your phone. Just press that reboot button and you have successfully installed the framework!
How to install Xposed

PART 2. DOWNLOAD THE MODULES YOU WANT:

– Firstly, note that some modules work on all devices and some work for specific mobile brands.
Download this xposed module form this link.
Install the module and reboot your device.
open the app any personalize the way you want it to be.
What will you personalise
  • you get a lollipop status + notification bar
  • a recent panel like lollipop
  • dailer ui from lollipop (few devices)
  • animations from lollipop


 for quick toggles

use power toogles from play store or u may use notification toggles / settings extended 


TURN YOUR KITKAT DEVICES TO LATEST LOLLIPOP UI

FOR NON ROOTED USERS

Android 5.0 Lollipop wallpapers

Android 5.0 Lollipop’s Material Design is much more mature and stylistically uniform throughout the entire system than KitKat ever was, no stone has been left unturned by Google’s developers when implementing the design changes. The wallpapers match this new look perfectly, and you can already download them. Install Android 5.0 Lollipop wallpapers

androidpit android lollipop wallpaper
I was able to use Lollipop wallpapers right on my Nexus 5 which runs Android 4.4.4 KitKat. / © ANDROIDPIT

Android 5.0 Lollipop Messenger

Google also introduced a new SMS and MMS app with Material Design. Messenger is a lot cleaner looking and user friendly than Hangouts, however it doesn’t combine your Hangouts messages. Google has basically gone back to the old system of two separate apps: one for text messages and one for messages using mobile data. Install Lollipop Messenger

androidpit lollipop sms 2
A quick look at Google's new messenger app. / © ANDROIDPIT

Android 5.0 Lollipop Keyboard

There was an Android L keyboard available since the Google I/O but this required root. Now anyone can install the APK right from the XDA developer website. First we would recommend uninstalling any previous Google Keyboard app, then head to XDA and install the APK. 
Once the Keyboard is installed, it will guide you on how to properly set it up, from switching it on in your settings, to making it your primary keyboard, to adding more languages. Make sure you go into the Lollipop Keyboard settings and choose either Material Dark or Material Light design. Install Lollipop Keyboard.

androidpit android lollipop keyboard
The Android 5.0 Lollipop Material Light is especially nice! / © ANDROIDPIT

The latest version of the Google Play Store

The Google Play Store had already received a Material Design update a while back, but the most recent update spreads the new user interface changes throughout the entire app, including a flatter icon, new animations and colors. Install the Google Play Store version 5.2.

androidpit google play store update version 5 1 1
Android 5.0 Lollipop also brings a new Play Store, which you can install now. / © ANDROIDPIT

Android 5.0 Lollipop sounds

In addition to having an Android 5.0 look and feel, what about sounds? You can make your phone sound like it’s got Lollipop running by simply installing the APK. Install Android 5.0 Lollipop sounds.

Nova Launcher

Though the APKS above will bring you individual components of Android Lollipop, there’s not much to speak of the functionality level. To get this, you could also just install the Nova launcher which will bring a bunch of new features that are very similar to Android 5.0.
For example, you will get Lollipop Circle Folder Animations, scroll indicator, icon themes for calculator, clock, contacts, downloads, email, dialer, settings and SMS apps and a preview of the scroll effects in the settings.
You will need to install some of the individual apps above to make the look complete though, like the wallpaper APK. Try out various combinations to see what you like the best.download.

androidpit nova launcher lollipop features